Back to library
Maths at home: Shapes and Area
One way to help your children improve their maths skills is to try using some maths language at home. If you don't feel confident about your own maths skills, don't worry! There are plenty of simple things that you can do and say in your regular routines at home.
You can help reinforce your child's geometry (shapes) skills at home, just by finding and talking about shapes at home. Another way in which you can strengthen these skills is through games or activities.
Try some of the ideas below - these do not take up a lot of time and are easy and fun to do.
Everyday routines
During your day, try talking about what you are doing, or by asking your child questions like the ones below.
Travel or sleepover
Encourage your child to pack their own bag, rearranging clothing and shoes so that they all fit.
Challenge your child to see if they can fit everything they need into an even smaller bag if possible.
Cooking or baking
When cooking or baking, encourage your child to describe the shape of the pots and pans, and help choose what shape pan to use. Talk to them about the different shapes, comparing and sorting them into groups. Older children could also measure the perimeter and area of the baking pans.
Cut fruit and snacks into shapes, or cut sandwiches or cheese into squares, rectangles and triangles. Name the shapes as you cut them up together. You can also use cookie cutters to cut shapes into melons or other fruits.
Make cookies with your child, moulding them into different shapes, or by using shaped cookie cutters. Describe the shapes with your child as you go.
Ask your child to help you decorate cookies and cakes, using different-shaped decorations. Talk about the different shapes you are using.
If you're preparing pizzas, use different shaped toppings or have your child cut the toppings into shapes. Name the shapes as they are cut.
Household chores and storage
Encourage younger children to put their toys away on a shelf and organise them so that they all fit. Ask them what shapes they are. Which shaped items fit next to each other easily? You can do the same with shopping items that need to be put away on a pantry shelf.
Encourage older children to estimate, then measure the perimeter of the lawn to be cut, and then to calculate the area of it.
Ask your child to estimate and then measure the area or perimeter around a garden bed (to help you buy enough soil), space in a garage (to help store items), or a room (to be painted).
Other routine activities
Encourage your child to make homemade greeting cards for family and friends, using a variety of shapes to decorate their cards.
Read picture books to your children and/or encourage them to read the books. Point out and talk about the shapes that you see in the book. Encourage your child to describe these shapes - how many sides and corners etc.
Games and activities
Years F-2
Shape up!
(for this game you need a cube-shaped cardboard box with a lid, and a marker pen)
Before playing this game, make a large dice out of a cube box with a lid. But instead of dots, draw a simple shape on each side of the box (eg: triangle, circle, rectangle etc).
Ask your children to take turns rolling the dice, then ask them to make the shape that they have rolled with their bodies. They can work together to make the shape if they need to. Talk about the shape: does it have straight sides? How many sides? Etc.
Shape hunt and sort
(this uses any mix of household items, like cups, jars etc)
In this game, ask children to go around the house and gather up as many different shaped items as they can in one minute (or you can change the time frame).
Once these items are gathered up, challenge the children to put what they've found into different groups based on their shape.
To encourage them to think about shapes, ask them to tell you how they decided to put certain shaped items into the groups that they did. For example, they might put all round items together, or cylinders (canned food) together.
Shape monsters
(for this activity, you need scissors and paper to cut out shapes, and glue suitable for children)
Before you start playing this with children, cut out various shapes from the paper. Include several copies of the same shape.
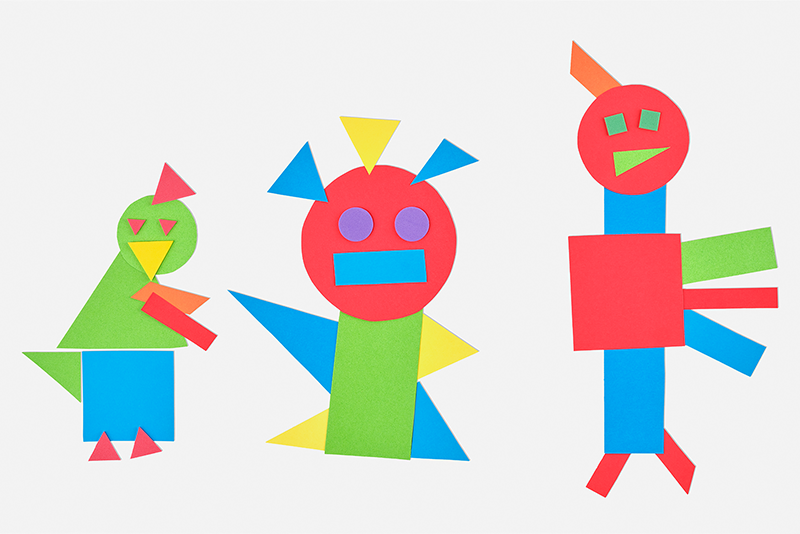
Give the shapes to your child, along with a piece of blank paper. Ask them to use the shapes and glue them together in any way that they would like to create a 'shape monster'. As they do this, encourage them to tell you about the shapes they have used, and how they chose to fit them together.
For example, they may have chosen a triangle with the point facing down for the body, a circle for the head, and another triangle with the point facing up to make a hat. Ask them why they chose these shapes, and what other shapes might work for the next monster's hat or head (see example above).
Years 3-4
Make 2-dimensional shapes and 3-dimensional objects
(this activity uses playdough/plasticine or marshmallows, plus toothpicks, straws, popsticks or pipe cleaners)
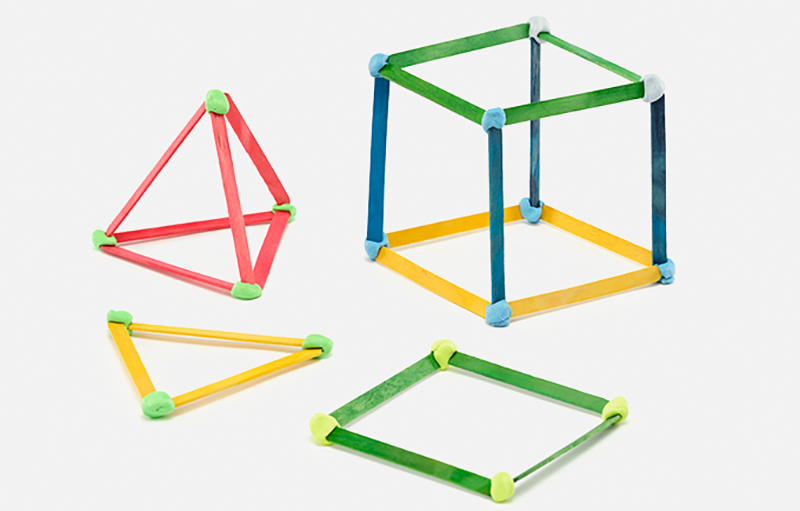
Give your child the playdough/plasticine or marshmallows, and the toothpicks, straws, popsticks or pipe cleaners. Ask them to create as many different 2-dimensional shapes and 3-dimensional objects as they can.
As they make their shapes, discuss the different parts of these shapes with them. How many edges does a shape have? How many corners? What is the name of the shape or object? For example: rhombus, triangle, cube, pyramid, prism etc.
Celebrity (shape) heads
(you need paper or thin cardboard to make headbands and shape cards, and tape or a stapler)
Before you start playing, make some headbands from paper, or gather up old ones if you have them. (Paper headbands are just a strip of paper, stuck together at the ends to form a circle big enough to fit on a head). Then cut up paper to about the size of playing cards, and draw a different shape on each one.
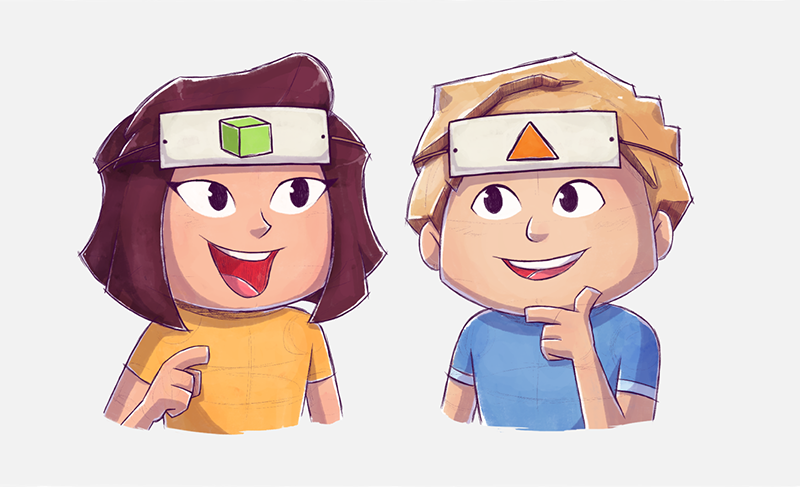
Stick a card with a 2-D shape or 3D object on it on the front of the headband. Make one headband with a shape stuck to it for each player in the game.
Start by placing a headband on each player, making sure they cannot see what their shape is.
Each player then takes turns asking one 'yes/no' question about their shape. Yes/no questions could be:
- Am I a 2-dimensional shape?
- Does my shape have three sides?
- Does my object have all right angles?
Once a player has enough clues about what their shape or object might be, they can make a guess on their next turn.
At the end of the round, children can take off their headbands and you can change the cards before they play again.

Make symmetrical paintings
(for this you just need some paper and child-friendly, washable paint)
Fold a piece of paper in half, then fold it back so it is flat and has a fold line down the middle. Give this to your child, along with the paint and a small spoon.
Encourage your child to put paint on one side of the paper only, by dropping spoonsful of paint or splattering different colours. Then ask them to fold the paper in half along the fold line and press down on the paper.
Once this is done, open the paper to see the symmetrical design that has been created. Discuss how one side is a mirror image of the other side.
As an addition, when the painting is dry you could ask your child to cut it along the fold line. Stick one half onto another piece of paper and encourage your child to draw the other symmetrical half, and colour it in.
Years 5-6
Make a tessellating design
(this requires several different coloured paper sheets, plain paper and glue)
Before you start the activity, take some coloured paper and cut out these shapes: triangles, squares, circles, rhombus, regular hexagons and trapeziums.
Ask your child to use the coloured shapes to make a tessellating pattern (shapes that fit together to form a pattern that has no gaps). Ask them to try making the patterns first, then when they are happy with the pattern they can glue the shapes onto the plain piece of paper.
Your child may start with one or two shapes to make their tessellating pattern. Ask them if they can make other tessellating patterns with the other shapes that you have given them. (The only shapes that can make a tessellating pattern are the regular hexagon, regular triangle, and the square.)
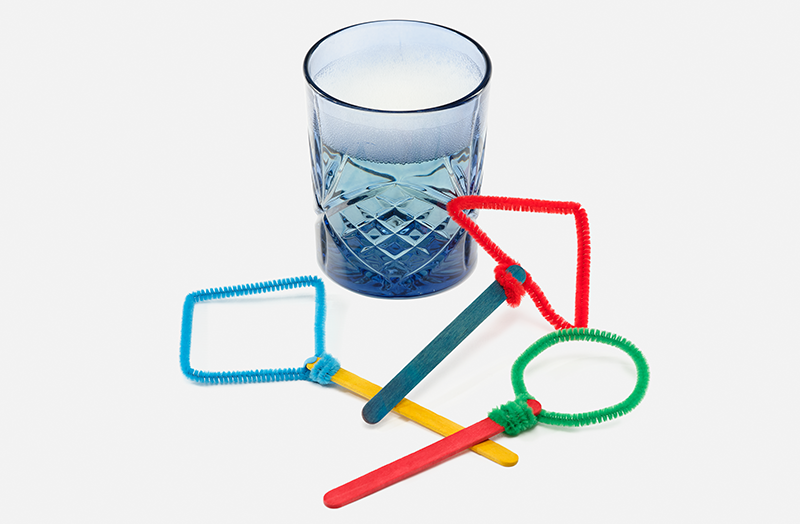
Make bubble shapes/objects
(To make the wands, you need straws or popsticks, pipe cleaners, and tape or bluetack to stick them together. Make the soap bubble mixture from dishwashing soap and water. You may also need child-friendly scissors if your child wants to cut the wands)
Give your child some pipe cleaners and ask them to make a 2-dimensional shape or a 3-dimensional object as a bubble wand. Stick the shapes onto popsticks with bluetack, or insert the end of the pipe cleaners into the straws to connect them together.
Once they have made a bubble wand, they can dip this into a mixture of dish soap and water and blow on these to form different-shaped bubbles. Discuss with your child what shape or object they have made. Ask them to describe the features of that shape or object.
Summary
These are some simple ways you can have fun using geometry with your child at home. As you try these ideas, see if you can adapt these ideas further, or think about other ways to emphasise geometry skills with your child.
These small actions show your child that maths is something you can do together, and it can be fun to play with these maths ideas. Trying some activities like these can help enormously with your child's confidence and enjoyment of maths.